
Used by NASA · the FBI · the U.S. Navy · Since 1999
How It Works: Professional Data Recovery Tools
- No Data, No Data Recovery Fee
- 27+ years of recovery experience
- Hardware imagers & firmware tools in-house
- Free evaluation, no obligation
What Tools Do Professional Data Recovery Specialists Use?
Hardware imagers, PC-3000 class firmware tools, NAND flash readers, lab workstations for platter work, and monolith decoding gear for single-chip flash. The work follows three steps: reconnaissance, gathering the right resources, and isolating the damaged drive so nothing writes to it.
Source: the three-step recovery workflow described below, as practiced in the eProvided lab.
Data recovery is the method by which raw data is moved from an unreadable device to a secondary storage medium, keeping the data faithful to the original so it can be used again. It is usually needed when a storage device fails in service and the files on it are needed to get work done. The professional tools involved are expensive and take years to learn, which is why do-it-yourself attempts so often fail on physically damaged media. See our full list of data recovery services for every supported device.
Professional recovery is a process, not a single program. First the problem is diagnosed without making it worse. Then the right hardware, cables and a large enough destination drive are lined up. Finally the damaged drive is isolated and read, never written to, so recoverable data is not overwritten. Specialist imagers and firmware tools do the reading.
Is a drive clicking, freezing or reporting the wrong size? Stop using it and request a free evaluation before any software touches it.
What a Data Recovery Technician Does
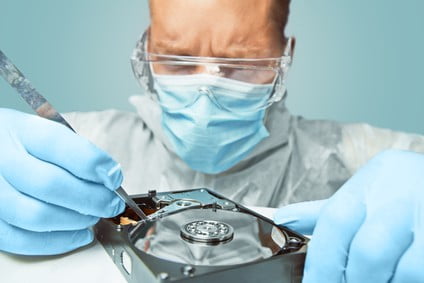
Data can be recovered from disks that met an untimely end through software or hardware failure. It cannot be recovered from drives that are physically damaged beyond a certain point, such as platters that have been scored down to bare glass or metal. Most recovery work is done on devices that simply cannot be accessed any more, or that have minor damage in the parts that read and write data.
Many software companies sell end-user tools for data recovery. Those usually target a problem booting the operating system or a flaw in the boot partition, where the hardware itself is healthy. Once the hardware is the problem, the job moves to the lab. Whatever the case, recovery happens in a series of logical steps, and skipping one is how drives get finished off.
The Professional Toolkit
A recovery lab looks nothing like a repair counter. The core tool is a hardware imager: a device that reads a failing drive sector by sector, skips damaged areas on the first pass, controls how hard the drive is pushed, and returns later for the difficult spots. Firmware tools in the PC-3000 class talk to a drive in its own service language, which lets an engineer repair corrupted firmware modules or disable faulty heads so the rest of the drive can be read.
Flash media needs different gear. NAND readers pull the raw contents from a desoldered memory chip, and monolith equipment reaches the tiny test points on single-chip cards and USB sticks. That chip-level work suits media without silicon-bound encryption. Modern SSDs and phones encrypt with a key locked inside the controller or processor, so for them the tools go toward repairing the original board or firmware, since reading the chips alone would return ciphertext.
Around all of that sit the plain essentials: powered test benches, write blockers, a supply of donor parts, and plenty of healthy storage to receive recovered images.
Step One: Reconnaissance
To plan a professional data recovery process, you first have to understand the problem the system is facing. That means isolating the possible culprits and finding which one is actually causing trouble with the drive or storage medium. Once that is known, you can look at how deep the damage goes. Sometimes a disk is too badly damaged physically to recover, and those are easy to spot and write off.
After judging the damage, examine the host machine to see whether the problem is likely to happen again once a new drive is connected. Sometimes the host’s connections or voltages are well beyond what the disk needs, and that excess can slowly destroy the drive. Spotting it lets you correct the fault before a replacement goes in.
Looking at the disk itself gives a feel for how much data it holds, and what type and importance the lost files are, so you know where to start. Finally, check the state and availability of any backups. They can be essential for confirming that recovered data is correct.
Step Two: Usable Resources
A recovery only goes properly with the right resources, human and otherwise. A working system to run the recovery on is a must, along with the tools to mount the drive in a safe, accessible spot. Those professional tools include the connectors to power the drive, plus whatever cables and mounting screws are needed. Ideally you bring in a storage recovery expert like eProvided, since a lab has seen a wide range of problems that the everyday user will likely never meet.
Before mounting the disk, decide where the recovered files will go. Ideally they land on a drive at least twice as big as the original, so space never runs out before the recovery finishes. A full image of the failing drive plus the extracted files can easily need that much room.
Step Three: Isolate
Chances are you are going to enlist a data recovery expert. Either way, one thing you must never do is install recovery software on the damaged drive. In fact, anything that writes to that drive is a definite no. Because of the nature of the damage, new writes can corrupt what is already there, which complicates the recovery later on.
Disks keep a record, much like a table of contents, of what is stored where. When a file is deleted or rewritten, the data is usually not erased at once; the entry in that file table is simply removed, and new information can later be written in its place. Installing a recovery program on the damaged disk risks writing right over the data you need back.
For a closer look at the dangers of do-it-yourself tools, see our guide to the risks of data recovery software.
Data Recovery Is Part of Owning a Computer
Professional data recovery is something most computer owners go through at some point. Hard drives are notorious for failing without warning. Still, if a hard drive starts making noise when it boots, it is a good idea to back up the data on it and buy a replacement. Precautions like that lower your chances of needing file recovery, but they never remove the need altogether.
Some of the more involved methods need specific tools to reach information on damaged drives. How long the job takes depends on how extensive the damage is and how recoverable the needed files are. A simple logical fault can be quick, while a drive needing head replacement or firmware repair takes longer, and an honest lab will tell you which one you have after the evaluation rather than before it.
| The Three Steps of Professional Recovery | ||
|---|---|---|
| Step | Main goal | Most common mistake |
| 1. Reconnaissance | Find the real fault and how deep the damage goes | Guessing and powering the drive on repeatedly |
| 2. Usable resources | Line up hardware, cables and a destination at least twice the size | Running out of space mid-recovery |
| 3. Isolate | Read the damaged drive without writing to it | Installing recovery software on the failed drive |
What Our Customers Say
Frequently Asked Questions
Recovery Services for Every Storage Device Class
If a device has already failed, eProvided covers each class this guide touches on: professional hard drive data recovery for Seagate, Western Digital, Toshiba and HGST, mechanical and logical; NAND flash chip-off recovery for unencrypted BGA, TSOP and monolith packages; SSD data recovery service for Samsung, WD, Crucial, NVMe and SATA drives through original-controller revival and firmware repair; USB flash drive data recovery for broken connectors and dead controllers; memory card data recovery for SD, microSD and CompactFlash; and microSD card data recovery, including monolithic cards. For phone, RAID and server work, browse all data recovery services →
The tools matter, but the order matters more: diagnose first, prepare second, and never write to the patient. That is how a professional lab keeps a bad day from turning into a lost drive.
Drive Beyond DIY? Get a Free Evaluation
Send us the drive before any software runs on it. We image it with hardware tools, report what is readable, and you decide from there.
Start My Free Evaluationor call (866) 857-5950 now
Related Recovery Services
These are the lab services that put the tools described above to work: